Download and Install Android 14 on Redmi Note 7 Pro (Violet)
The Latest Android 14 is being officially rolled out to many devices. Unfortunately our Redmi Note 7 Pro won’t get the Android 14 update officially. But if you still want to try the latest Android 14 and experience its new features, you are in the right place. Because in this blog post, I will tell you how you can easily install Android 14 on your Redmi Note 7 Pro device.
This is the first Android 14 ROM for Redmi Note 7 Pro. This ROM is maintained by @Joker_V2_0. This is an AOSP build where you will get the stock Android OS without any additional features or customizations. Everything that Google added to the Android 14 can be found in this ROM. A massive thanks to @Joker_V2_0 for bringing the Android 14 ROM to our Redmi Note 7 Pro.

ROM details:
- ROM Name: Android Open Source Project (AOSP)
- ROM Type: AOSP
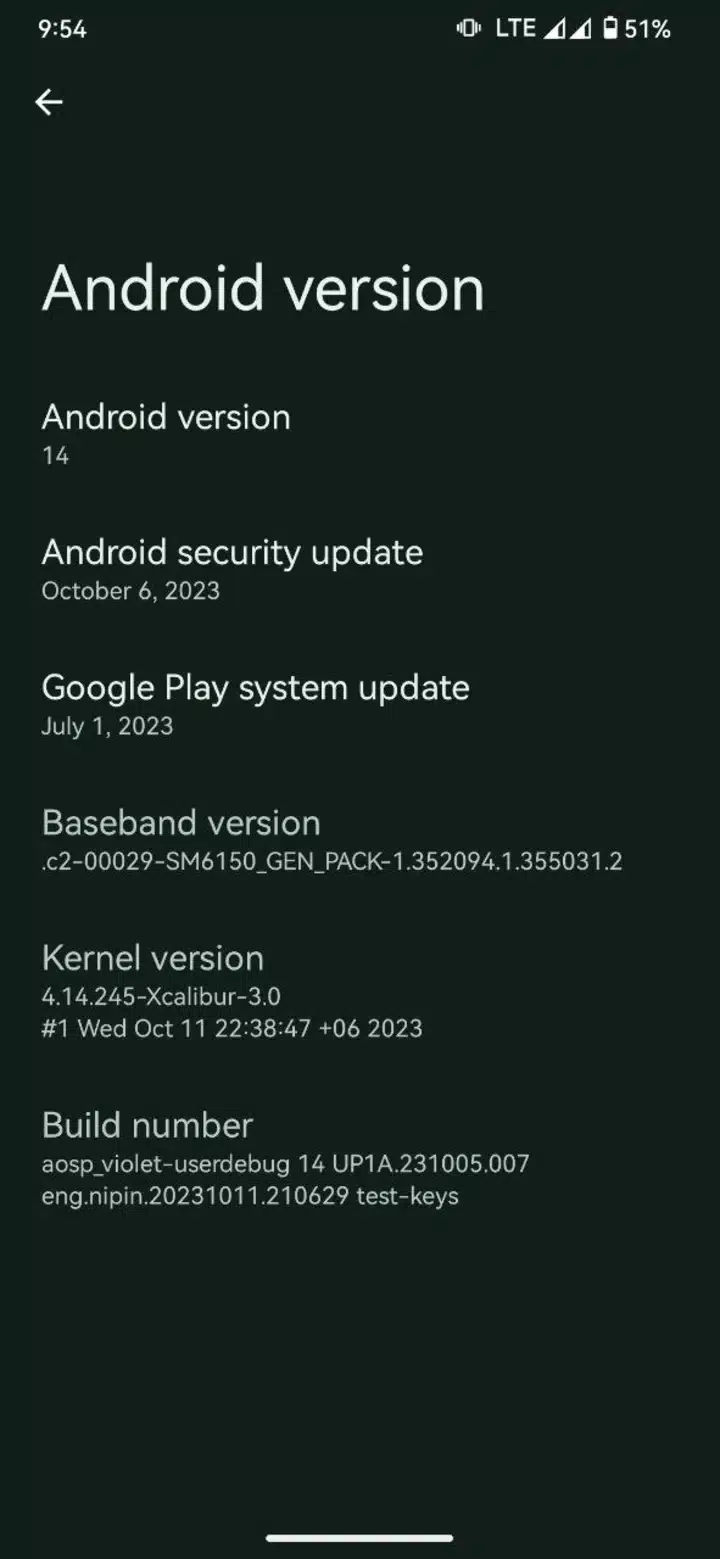
- Android Version: 14(U)
- Firmware and GApps included
- Android Security Patch: October 2023
- Kernel: Xcalibur 3.0
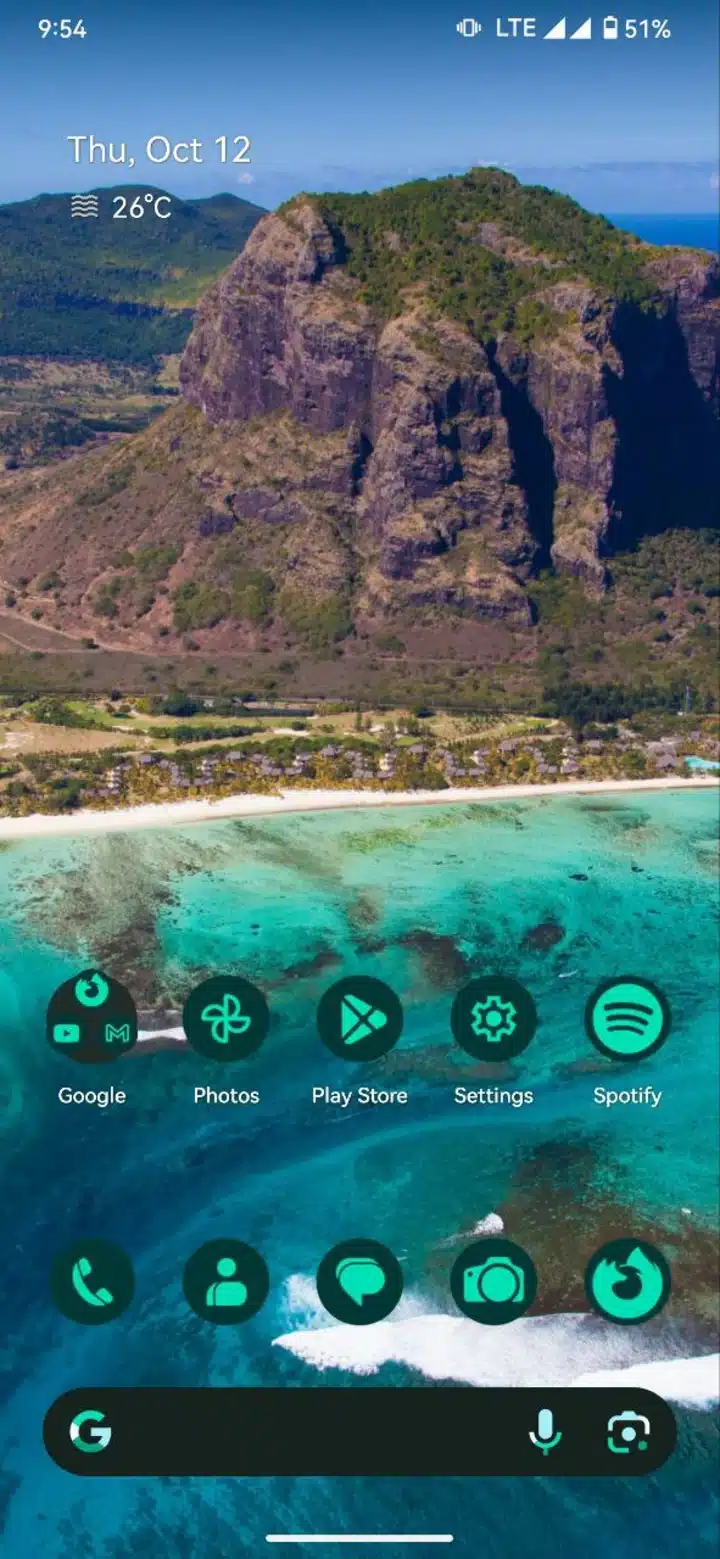
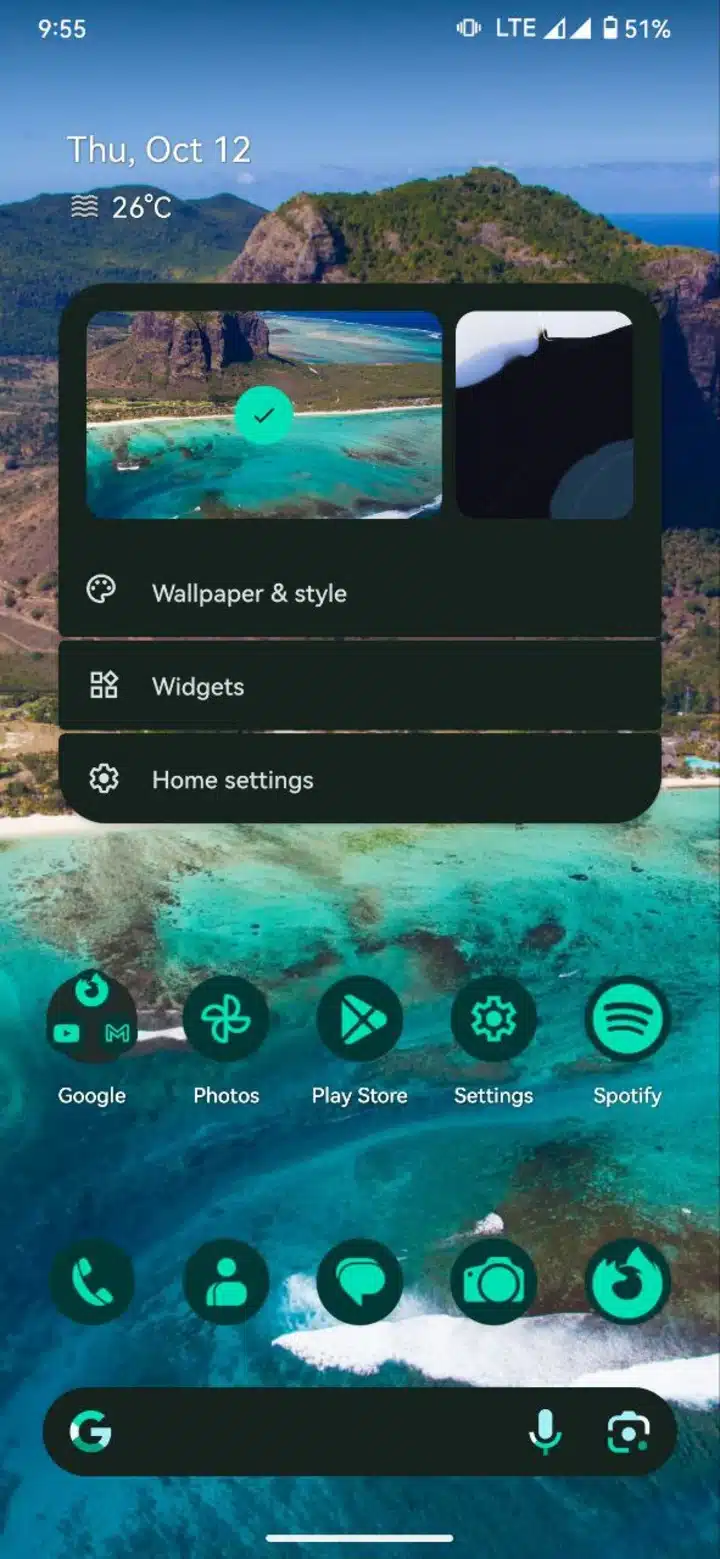
Screenshots of Android 14 ROM on Redmi Note 7 Pro


Requirements to install Android 14 on Redmi Note 7 Pro
As the Redmi Note 7 Pro isn’t eligible to get Android 14 officially, the rest method is to flash a Android 14 custom ROM. In order to flash a custom ROM, the bootloader of the phone must be unlocked. Additionally a custom recovery is required to flash third-party OS in a phone.
If you don’t have the bootloader unlocked and a custom recovery installed, you will find so many videos on YouTube on this topic. So in this blog post, we will only focus on installing the Android 14 on an bootloader unlocked Redmi Note 7 Pro device.
So in short, the requirements or prerequisites are:
- Bootloader unlocked Redmi Note 7 Pro
- A custom recovery installed that supports Android 13: Latest TWRP or OrangeFox
Required Files for flashing Android 14 on Redmi Note 7 Pro
- Download Android 14 for Redmi Note 7 Pro
- Latest TWRP or OrangeFox for Redmi Note 7 Pro
- Download Dfe V4 for Redmi Note 7 Pro
- Magisk (Optional)
Steps to install Android 14 on Redmi Note 7 Pro
Make sure you have backed up all your important data before proceeding. It is recommended to put the ROM and additional files into a microSD card or USB pendrive.
Step 1: Booting into Custom recovery
Step 1.1: Turn off your device.
Step 1.2: Press and hold Power and Volume Up(+) key until you see the Redmi logo on the screen.
This will boot your phone into the custom recovery mode.
Step 2: Setting up for a clean Flash

Step 2.1: Go to the Wipe section of your recovery.
Step 2.2: Go to Advanced Wipe. Wipe Dalvik, Cache, System, Vendor, Data partitions. Leave the internal storage partition.
Step 3: Flashing Android 14 ROM
Step 3.1: Tap on the install button from TWRP Home Screen.
Step 3.2: Browser to the folder where you have the Downloaded Android 14 Zip file.
Step 3.3: Click on the Zip file and Swipe to install
Step 3.4: Flash Dfe V4 if you are encrypted.
Step 4 (Final Step): Format Data
After you flash the Android 14 Zip file, perform a format of the data partition to complete the clean flash process.
You can additionally install a Magisk zip file if you want to root your phone.

Then simply reboot into the system. Your phone should now reboot into the fresh Android 14 OS. Setup the phone and Enjoy the latest Android features on your old Redmi Note 7 Pro device.
Muhammad Menhajul Islam (also known as ‘Minhaz’) is a B.Sc student studying Mathematics in Govt. B.M. Collage, Barishal, Bangladesh. He has been a Android die-hard fan since 2015.